
Understanding Screen Printing
Screen printing is a popular method of printing designs on various surfaces, including textiles, paper, and plastic. It involves pressing ink through a mesh screen onto the surface, creating a precise and high-quality print. To achieve the best results, it’s important to understand the basics of screen printing and the importance of film positives in the process.
Basics of Screen Printing
Screen printing involves several steps, including preparing the artwork, creating the stencil, and printing the design onto the surface. Here’s a brief overview of each step:
- Preparing the artwork: The first step is to create the artwork for the design using software like Adobe Illustrator or Photoshop. The artwork should be created in black and white with crisp, clean lines.
- Image Optimization Techniques: Optimizing your image is crucial before printing your film positive: Resolution: Ensure a high resolution — typically 300 dpi or greater.
Halftones: If your design requires gradients, use halftones at an appropriate line per inch (LPI) setting.
Detail: Sharpen your image to preserve all the fine details. - Correct output settings will help you achieve an opaque and dark film positive: Opacity: Check that the black used in your artwork is set to 100% opacity.
Color Separation: If the design has multiple colors, separate each color layer.
Registration Marks: Add front and back-centered crop marks to align your design on the shirt. - Creating the stencil: The next step is to create the stencil, which is done by exposing a light-sensitive emulsion-coated screen to UV light through the opaque film positive. The emulsion hardens where the light hits it, creating a stencil allowing ink to pass through onto the surface.
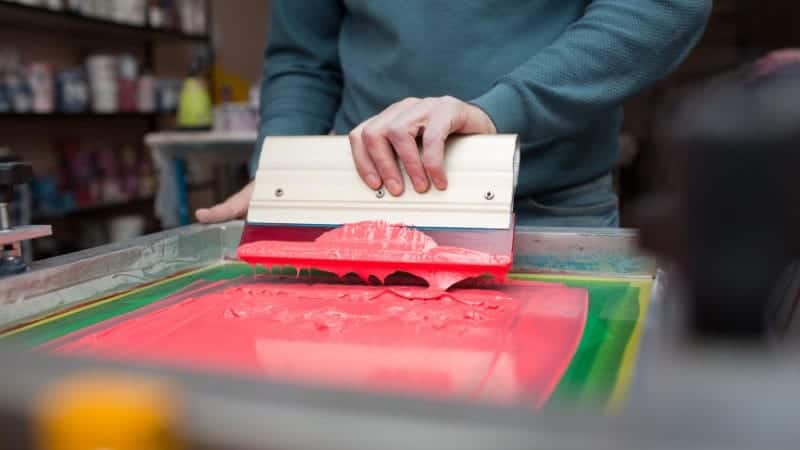
- Printing the design: After creating the stencil, ink is applied to the screen and pressed through the mesh onto the surface using a squeegee. The screen is then lifted, and the print is complete.
Importance of Film Positives in Screen Printing
To start screen printing stencils, you must have a high-quality film positive. Film positives that will block the light make them an essential component of the screen printing process. They are used to create the stencil by blocking out light where the design should not be printed. Here are some reasons why film positives are so important:
- Accuracy: Film positives ensure that the design is accurately transferred onto the stencil, which is crucial for creating a high-quality print.
- Detail: Film positives allow for intricate designs to be printed with precision, ensuring that every detail is captured.
- Consistency: Film positives ensure that each print is consistent, with the same design and placement on each surface.
Overall, understanding the basics of screen printing and the importance of film positives is essential for achieving the best results. By following these steps and using high-quality materials, you can create beautiful and precise prints that will last for years to come.
Preparing for Screen Printing
Before you start making your film positive for screen printing, you need to prepare your workspace and gather all the necessary tools and materials.
Tools and Materials Needed
Here are some of the right materials and tools you will need to make a film positive for screen printing. By the way, using inkjet film is recommended because it is sturdier :
| Tools | Materials |
|---|---|
| Computer | Inkjet Printer |
| Graphics Software (e.g. Photoshop, Illustrator) | Film Positive or Transparency |
| Ink | Clear Tape |
| Scissors or Cutting Tool | Ruler |
Screen printing employs two varieties of ink: pigment-based and dye-based ink. Dye-based ink is often favored as it tends to be sturdier and more likely to create opaque print, thereby yielding a high-quality film positive. It is advisable to use dye-based ink when working with an inkjet film.
Make sure you have all of these items before you start. It’s important to use an inkjet printer as opposed to a laser printer because inkjet printers produce more opaque prints, which allow you to create a good film positive. Additionally, make sure the ink you are using is compatible with the film or transparency you are using.
Inkjet vs Laser Printers:
- Inkjet printers are generally recommended for creating film positives in screen printing due to their ability to produce dense, opaque blacks—essential for sharp stencil creation. Ensure that you find the best all-black ink settings for your specific printer model. Printer Type Advantages Inkjet Printer – Dense blacks – Sharp images
- Laser printers can be used but may not achieve the same level of darkness as inkjets. However, they can be more cost-effective for some users and are faster, which can be beneficial for high-volume printing. Printer Type Advantages Laser Printer – Cost-effective – Fast printing speed
Setting Up the Workspace
Now that you have gathered your tools and materials, it’s time to set up your workspace. You’ll want to work in a clean, well-lit area with plenty of space to spread out your materials.
Here are some tips for setting up your workspace:
- Clear a large, flat surface to work on.
- Make sure your printer is set up and ready to go.
- Keep your graphics software open and ready to use.
- Have your film or transparency ready to print on.
- Keep your cutting tool, ruler, and clear tape nearby.
By setting up your workspace properly, you’ll be able to work more efficiently and create a better film positive for your screen printing project.
Make a Film Positive
Once you have your design ready and your screen prepped, it’s time to create your film positive. This is an essential step in the screen printing process, as it will determine the quality of your print. Here are the steps to create a film positive for screen printing:
Designing the Image
The first step is to design your digital image using software such as Adobe Photoshop or Illustrator. Keep in mind that your design must be in black and white, with no shades of gray. This is because the film positive must be opaque enough to block light during the exposure process.
When designing your image, remember to add center crop marks and registration to each image layer. These marks will help you line up your film positives and align your screens when printing colors. You can use a template or create your own registration marks using the shape tool.
Transferring the Image to Film
Once your design is complete, it’s time to transfer it to film. You can use an inkjet or laser printer to print your film positive. However, make sure to use a printer with a high resolution and a black ink cartridge with a high density.
Here are the steps to transfer your image to film:
- Load your transparency film into the printer.
- Open your design in the software and select the print option.
- Choose the correct printer and printer settings. Make sure to select the highest resolution and density possible.
- Print your design onto the transparency film.
- Allow the ink to dry completely before handling the film.
Once you have your film positive, you’re ready to move on to the next step in the screen printing process. Remember to handle your film with care and avoid creasing or folding it, as this can affect the quality of your print.
Handling Multi-Color Jobs
For multi-color designs, correct color separation and registration are essential:
- Color Separation: Break down your design by color layers, each layer representing a separate screen.
- Registration Lines: Add registration marks to each film positive to align your colors accurately during the screen printing process.
Steps to follow:
- Create a separate film positive for each color layer in your design.
- Ensure each film is marked with registration lines for precise alignment.
- Check that each color layer is opaque to prevent light from curing unintended areas of the photo-sensitive emulsion.
Screen Printing Process
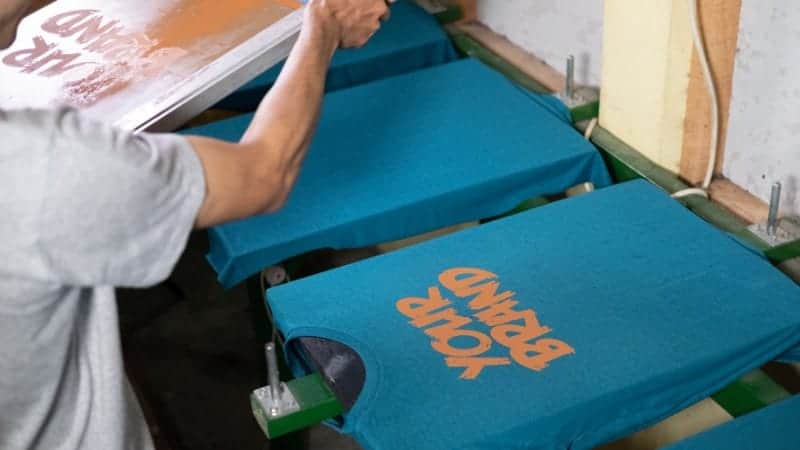
Screen printing is a popular technique for transferring designs onto various materials, including t-shirts, bags, and posters. The process involves creating a stencil or screen that allows ink to pass through only in certain areas, resulting in a precise and vibrant design. Here are the three main steps involved in the screen printing process:
Applying the Film Positive
The first step in screen printing is to create a film positive, which is a black-and-white image of your design printed onto a transparent film. This film positive will be used to create the stencil or screen that will be used to transfer the design onto your chosen material. Once you have your film positive, you will need to apply it to the screen using a light-sensitive emulsion.
Keep in mind if your film positives aren’t sufficiently dark, light can infiltrate and start to solidify your emulsion. This could result in a loss of print details, such as halftones, or even a complete overexposure of your screens. Overexposure of screens can lead to the emulsion becoming challenging to wash out and develop the screen. Minor overexposure could result in losing 5% to 25% of halftones, while major overexposure could lead to complete prevention of your design washing out or developing.
Exposing and Developing the Screen
Once you have applied the film positive to the screen, it’s time to expose it to light. This will cause the emulsion to harden in the areas where the film positive blocks the light, creating a stencil or screen that allows ink to pass through only in certain areas.
After exposing the screen, it’s time to develop it. This involves washing away the emulsion in the areas where the film positive did not block the light, leaving behind a stencil or screen with your design.
Printing the Design
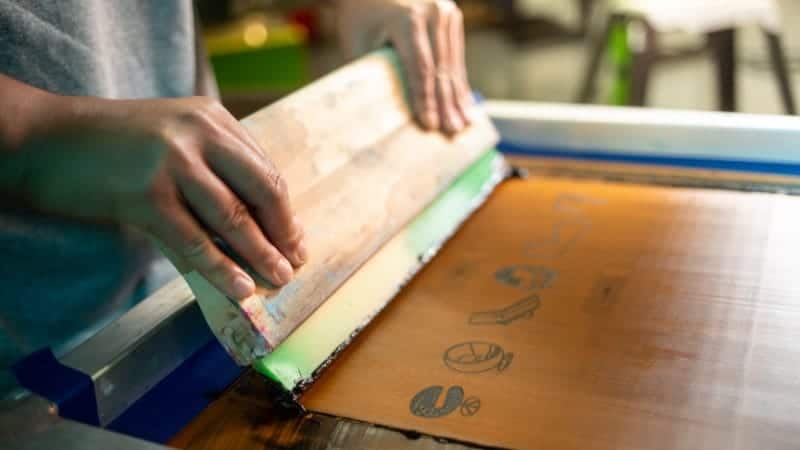
Now that you have your stencil or screen, it’s time to start printing your design onto your chosen material. Place the material onto a flat surface and position the screen on top, making sure that the design is aligned correctly.
Using a squeegee, apply ink to the screen and pull it across the design, forcing the ink through the stencil and onto the material. Repeat this process for each color in your design, allowing each layer of ink to dry before applying the next.
With these three main steps, you can create vibrant and precise designs using the screen printing process. Take your time and follow each step carefully to ensure that your final product is of the highest quality.
How to Deal with Troubleshooting
Common Issues in Making a Film Positive
When making a film positive for screen printing, there are a few common issues that you may encounter. Here are some tips to help you troubleshoot these issues:
- Inconsistent ink density: If your film positive has areas that are too light or too dark, the issue may be with your printer settings. Adjust the printer settings to achieve the most black ink your printer can produce.
- Light leaks: If your film positive has light leaks, it may be due to a lack of opacity. Use a high-quality, opaque film and ensure that your printer settings are optimized for maximum ink density.
- Poor registration: If your film positive is not registering properly, the issue may be with your artwork or your exposure process. Ensure that your artwork is properly aligned and that your exposure times are accurate.
Improving Screen Printing Results
To achieve the best results when screen printing, there are a few tips that you can follow:
- Use high-quality materials: Use a high-quality emulsion, ink, and film to achieve the best results. Cheap materials can lead to poor-quality prints.
- Optimize your exposure times: Proper exposure times are critical for achieving sharp, detailed prints. Test your exposure times and adjust as needed to achieve the best results.
- Maintain your equipment: Regularly clean and maintain your equipment to ensure that it is functioning properly. This includes your screen printer, exposure unit, and screens.
- Experiment with different techniques: Don’t be afraid to experiment with different techniques to achieve the best results. Try different mesh counts, ink types, and squeegee techniques to find what works best for you.
By following these tips and troubleshooting common issues, you can create high-quality film positives and achieve excellent screen printing results.
Frequently Asked Questions
What materials are best for making high quality film positives for screen printing?
When it comes to making film positives for screen printing, the best material to use is inkjet transparency film. This type of film is specifically designed to work with inkjet printers and produce high-quality, opaque images that are perfect for screen printing.
How do you properly store film positives for screen printing?
To ensure that your film positives remain in good condition, it is important to store them properly. The best way to do this is to keep them in a cool, dry place, away from direct sunlight. You can also store them in a protective sleeve or folder to prevent them from getting damaged.
What is the difference between film positive and film negative for screen printing?
A film positive is a transparent sheet of film that has an opaque image printed on it. This type of film is used to create the stencil for screen printing. A film negative, on the other hand, is a transparent sheet of film that has a negative image printed on it. This type of film is used in other printing processes, but not for screen printing.
Can you print film positives on an inkjet printer or do you need a special printer?
You can print film positives on an inkjet printer, but it is important to use the right type of ink and transparency film. Pigment-based inks are best for printing film positives, as they produce a more opaque image. You should also use inkjet transparency film that is specifically designed for use with inkjet printers.
What is the best RIP software for creating film positives for screen printing?
There are a number of RIP (Raster Image Processor) software programs available for creating film positives for screen printing. Some of the most popular options include AccuRIP, FilmMaker, and UltraSeps. It is important to choose a software program that is compatible with your printer and produces high-quality images.
Are there any services that offer film output specifically for screen printing?
Yes, there are a number of print shops that provide services that offer film output specifically for screen printing. These services use high-quality inkjet printers and transparency film to produce film positives that are ready to use for screen printing. Some popular services include Film Output Solutions, FilmMaker Pro, and Chromaline.